
| BMW Garage | BMW Meets | Register | Today's Posts | Search |

|
|
|
| 02-28-2010, 02:13 AM | #1 |
|
Colonel
 
242
Rep 2,377
Posts
Drives: Perfomance Model 3
Join Date: Jan 2007
Location: Denver, CO
|
anyone know how to remove the side markers? these are much different then other BMW model sidemarkers which are pretty easy to remove. is there a secret tab? push/lift? any help would be appreciated.

__________________
'18 Tesla Perfomance Model 3 White on White Performance Upgrade Pkg & EAP
*RETIRED* 2015 435xi GC [f36] | 2012 335i [f30] | 2009 z4 35i [e89] | 2007 335i coupe [e92] | 2001 325Ci [e46] *RETIRED* |
| 02-28-2010, 09:48 AM | #3 | |
|
Lieutenant
 
14
Rep 530
Posts |
Quote:
 Looks like there is nothing special to removing the sidemarkers, at least according to this post: http://e89.zpost.com/forums/showthread.php?t=320268 |
|
|
Appreciate
0
|
| 02-28-2010, 10:31 AM | #5 | |
|
Lieutenant
14
Rep 530
Posts |
Quote:
|
|
|
Appreciate
0
|
| 02-28-2010, 12:58 PM | #6 | |
|
Colonel
242
Rep 2,377
Posts
Drives: Perfomance Model 3
Join Date: Jan 2007
Location: Denver, CO
|
Quote:

__________________
'18 Tesla Perfomance Model 3 White on White Performance Upgrade Pkg & EAP
*RETIRED* 2015 435xi GC [f36] | 2012 335i [f30] | 2009 z4 35i [e89] | 2007 335i coupe [e92] | 2001 325Ci [e46] *RETIRED* |
|
|
Appreciate
0
|
| 02-28-2010, 07:14 PM | #7 |
|
Private First Class
 9
Rep 140
Posts |
This is easy..
Sorry once again I do not have pictures (I know - no pics - it didn't happen.)
But really this is a simple DIY: (Took me 30 minutes in my garage.) Open the hood. On either side above the lights are steel plates that guide hood pins into the top of the quarter panels. These are attached by two Torx screws. Remove this plate and you will be able to look into the cavity behind the side maker. (You will need a flashlight) The Plastic side marker housing is held in place by plastic tabs (at the front) and a plastic "L" shaped ledge at the rear. Confirm this by looking into the quater panel. This distance to the side marker from the opening is about 16 - 18 inches. I used a LONG wood bit for a screw driver. While pulling on the edge of the (front) of the side marker, push on the tab from inside the quarter panel. With gentle massaging and some luck the front will pop out without breaking the tab. The rear will slide forward and the entire assembly will be hanging from the wiring to the light in the marker. (Do not use any tool to pry or you will break the plastic or scratch your paint. Remove the wiring from the marker and attach it to the new side marker assembly. Install is opposite of removal. Rear "ledge" in first - then pop front portion and tab back into the quarter panel. Dont forget to reinstall the guide plate in EXACTLY the same position on the top of the quarter panel. (Confirm placement by lowering hood to closed position BEFORE tightening Torx screws.) I replaced the white markers with tinted versions (from IND) on my wifes car. IND has tinted side markers both Dark and Medium tint. I got the Medium for her Crimson Red, 35i. They look nice and are very good quality.  http://parts.ind-distribution.com/pr...o=368:thumsup: Good luck.. Again sorry no pics but I am in Texas and my (wifes) Z4 is in Germany.  |
|
Appreciate
0
|
| 02-28-2010, 09:52 PM | #8 | |
|
Colonel
242
Rep 2,377
Posts
Drives: Perfomance Model 3
Join Date: Jan 2007
Location: Denver, CO
|
Quote:

__________________
'18 Tesla Perfomance Model 3 White on White Performance Upgrade Pkg & EAP
*RETIRED* 2015 435xi GC [f36] | 2012 335i [f30] | 2009 z4 35i [e89] | 2007 335i coupe [e92] | 2001 325Ci [e46] *RETIRED* |
|
|
Appreciate
0
|
| 03-27-2010, 12:47 PM | #9 |
|
Enlisted Member
 7
Rep 39
Posts |
Got my side tinted side marker lamps from Andrew at IND - they look great, but I wasn't able to follow the install instructions and hints provide in this thread.
I am drawing a blank getting access to the back of the lamp to bump it out - can't see any panel (attached by torx screws) above the lamp that I can remove. I do see a opening in the side panel itself that you can get to the front of the lamp but cant visualize how the front of the lamp attaches. Appears you could remove the wheel and the inner fender and get to it that way - but that seems like more work than needed. Appreciate any additional help. Have included two pics - one of the side panel and another of the front of the lamp that may help someone explain. Thanks Ross 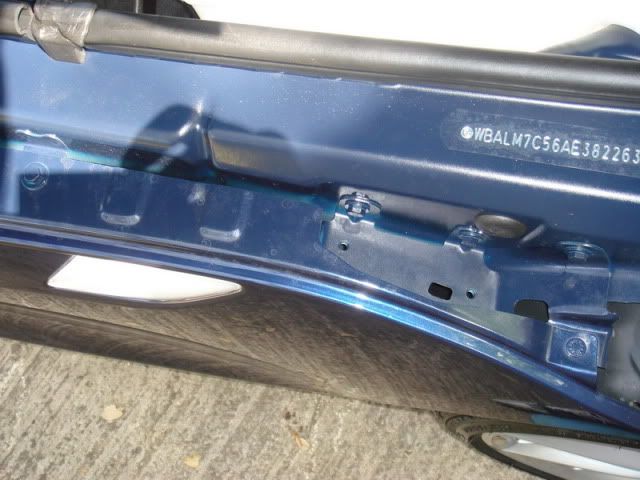 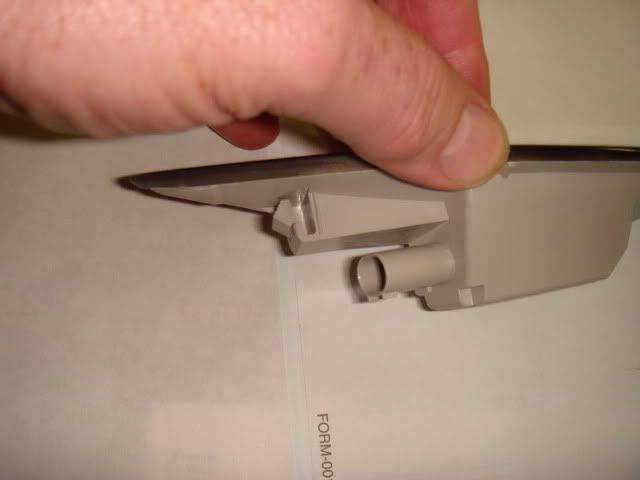 |
|
Appreciate
0
|
| 03-28-2010, 01:54 PM | #10 |
|
Private First Class
9
Rep 140
Posts |
I will try to clarify
OK, Here is the area where on my car there is a plate and guide post for the hood.
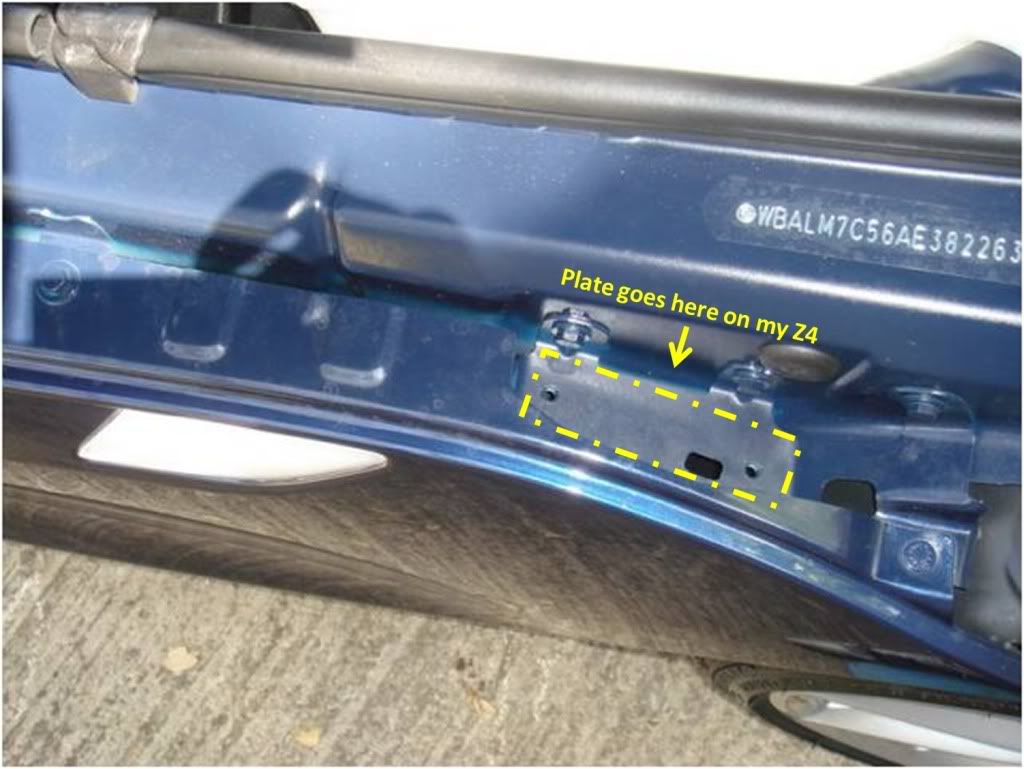 Since you do not have the plate - that step is unnecessary. 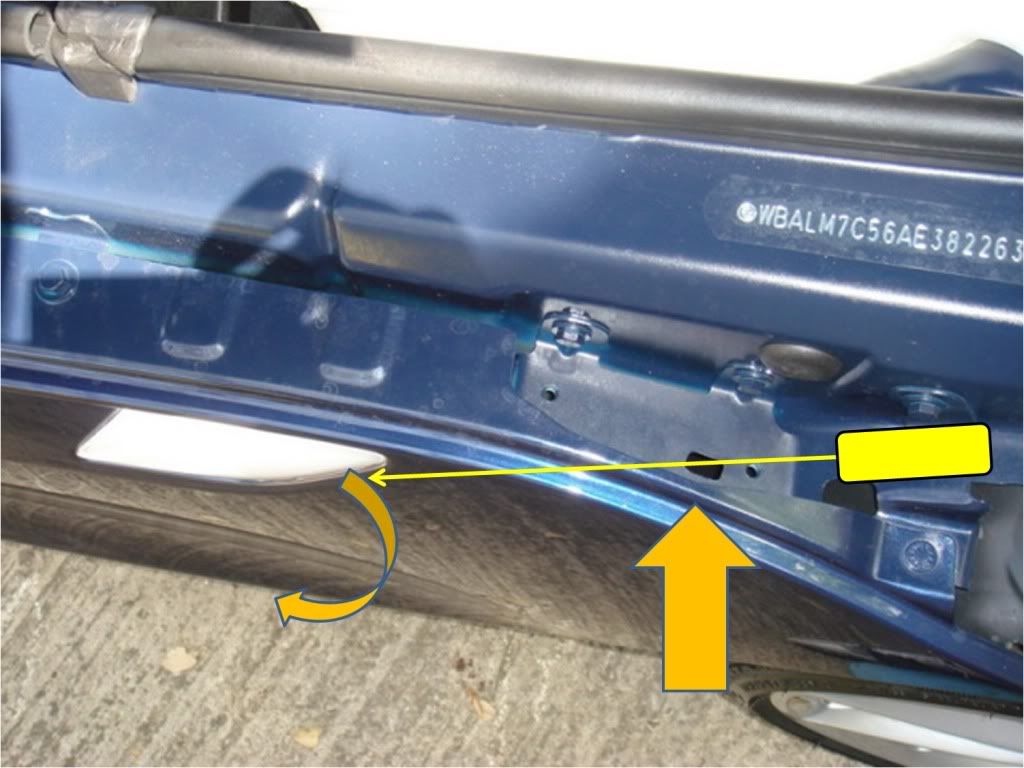 Use a flashlight to look into the hole and ID the tab on the front of the side marker. Using a LONG screwdriver or I used a long drill bit to push in the tab. The assembly will then pop out towards you like this: 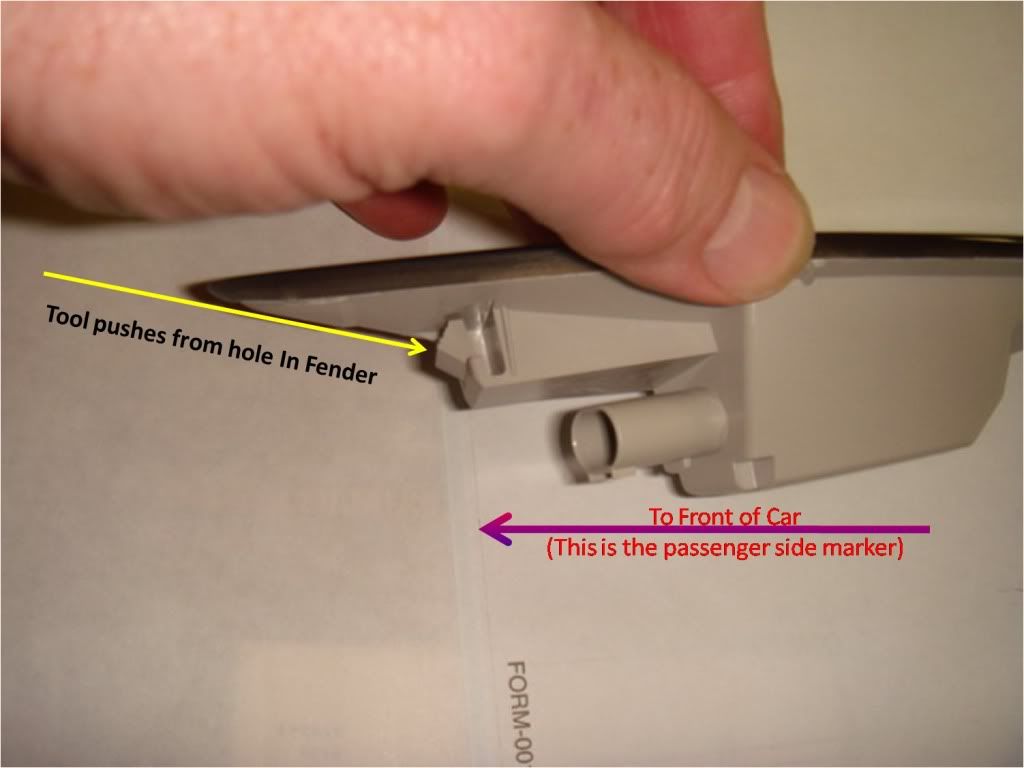 IM me if you need clarification of any of this.. It really is easy and DOES NOT require removal of any wheel well components..  |
|
Appreciate
0
|
| 03-28-2010, 06:54 PM | #12 |
|
Enlisted Member
7
Rep 39
Posts |
Awesome help - thanks LofgrenCL for taking the time to explain and document it. When complete will take some pics to show the results for the folks who ask why.
|
|
Appreciate
0
|
| 03-29-2010, 04:28 PM | #14 |
|
Private First Class
9
Rep 140
Posts |
Anyone can buy a car at the Stealership and drive it.. I want my wifes car to be more personal. She loves the tinted sidemarkers and her Z is the only one in Stuttgart with them. Its an attention to detail thing. If you have to ask why then you probably wont understand.
 Maybe if I had pics of my wifes car (Red 3.5 with 19's) then you might understand. But I suspect there will always be people who just live to cause trouble. Glad to be of help. PM if you have any trouble. It really is not that difficult (if I figured it out!!) Last edited by LofgrenCL; 03-29-2010 at 04:29 PM.. Reason: eror |
|
Appreciate
0
|
Post Reply |
| Bookmarks |
|
|