I hate having a GPS power cord hanging down and getting in the way, so I bought a few items from Amazon and did my own install.
We all know how difficult it is to obtain manuals or schematics to do our own work, so here is a DIY that may help out.
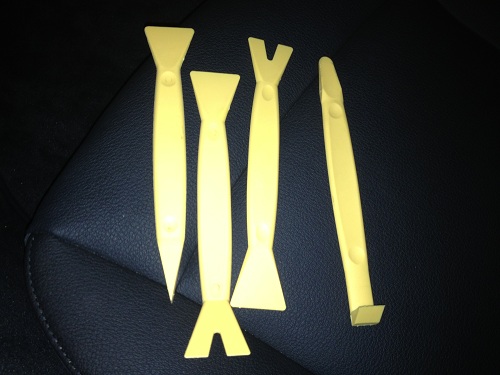
I bought these trim removal tools from Harbor Freight. A must have to protect your trim peices. You will also need a #2 phillips screwdriver, 1/4" drive ratchet with 8mm socket, wire cutter and wire strippers.
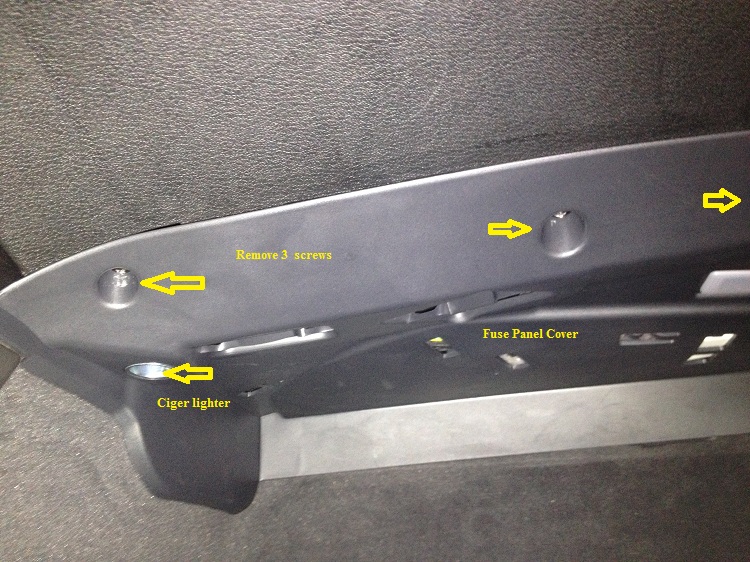
Locate the fuse panel beneath the glovebox on the passenger side and remove the 3 phillips head screws to remove the panel.
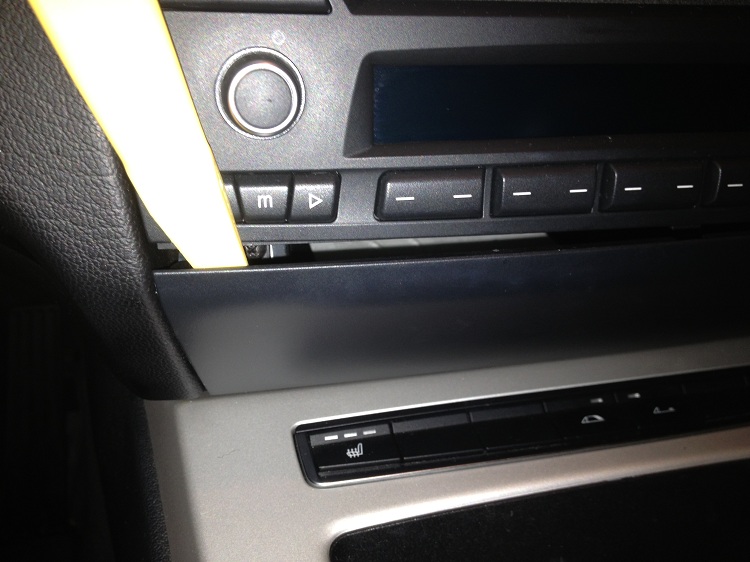
Use one of the plastic trim tools and gently pry the panel below the radio out. It is held in by 4 pins, one in each corner.
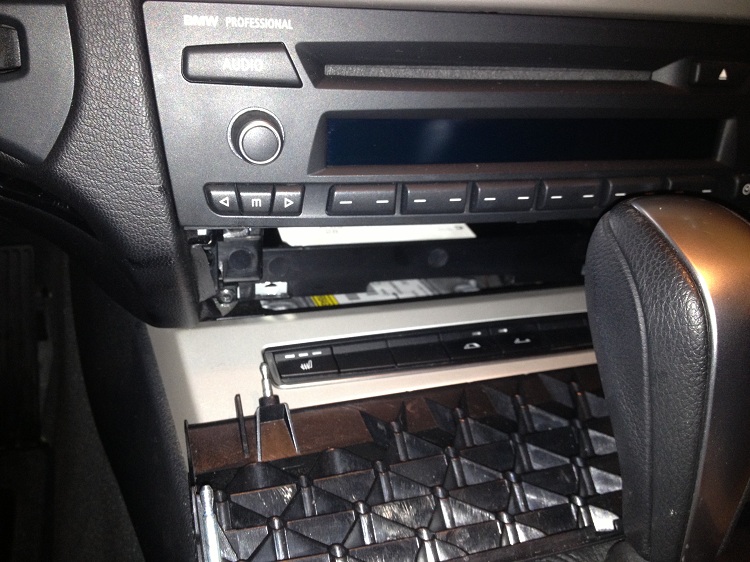
With the panel removed, you can see two screws below the radio that hold it in place.
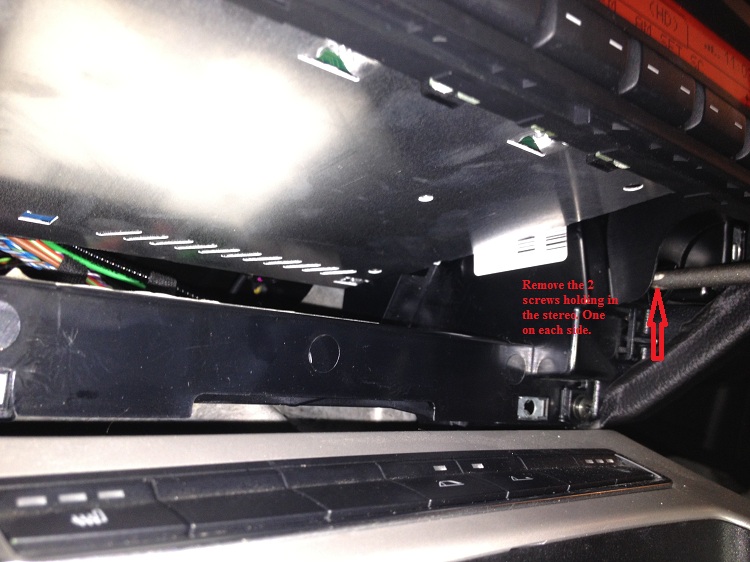
Remove the two screws and pull the radio out. Reach back behind the radio and guide the wire harness out to allow access of your hand.
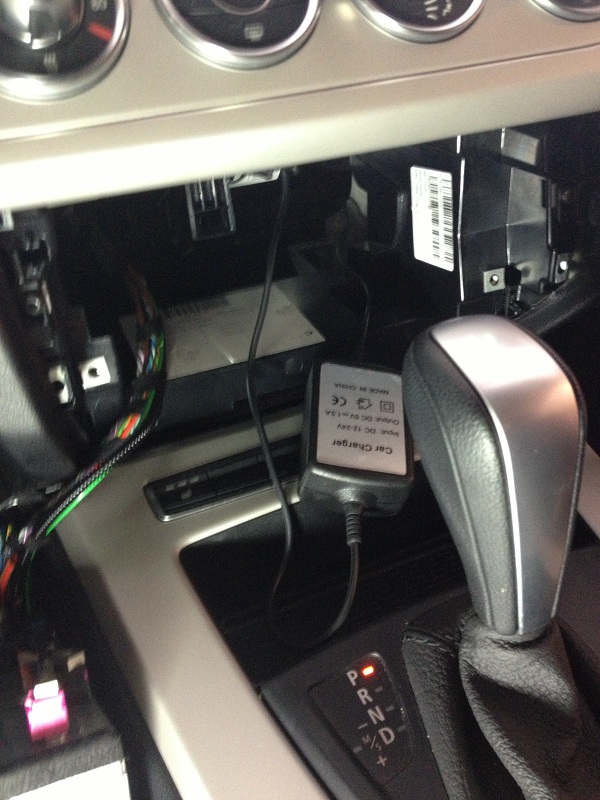
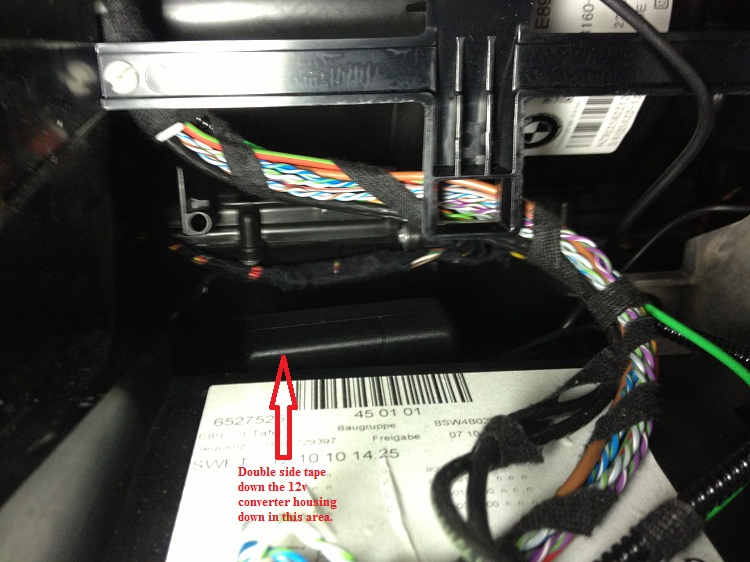
Place your Garmin 12v converter in the back and use 2 sided tape of velcro to secure the box from moving and out of the way of the radio.
This is where I set mine.
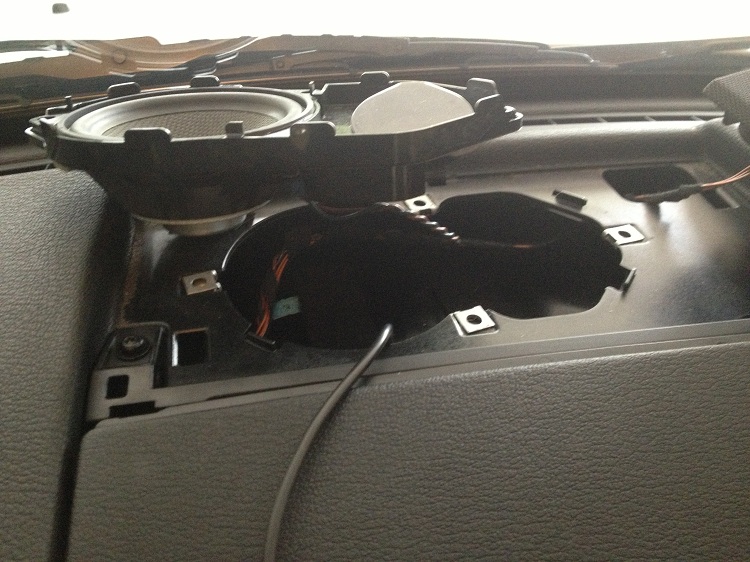
Pry off the front center speaker cover off using a trim tool and remove the speaker with the ratchet and 8mm socket. Fish a sturdy wire down to the radio opening and attach the GPS connector from the converter box and pull it up into the speaker opening.
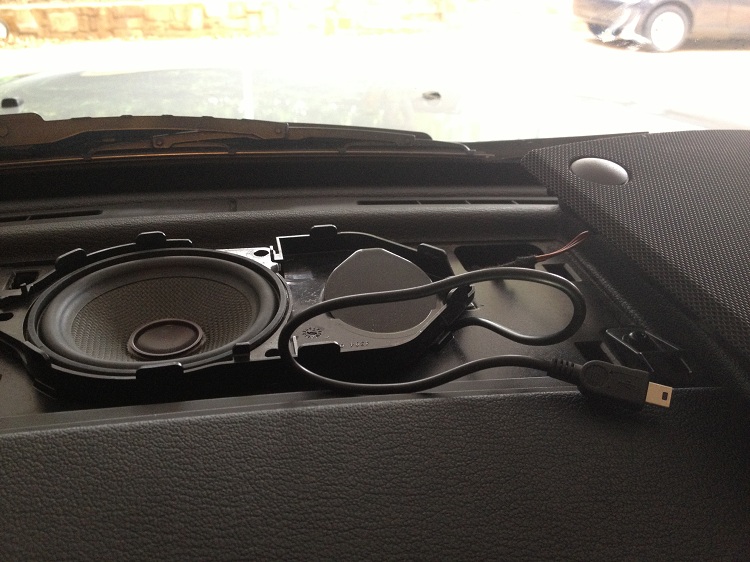
Reattach the speaker after pulling up all of the cable slack.
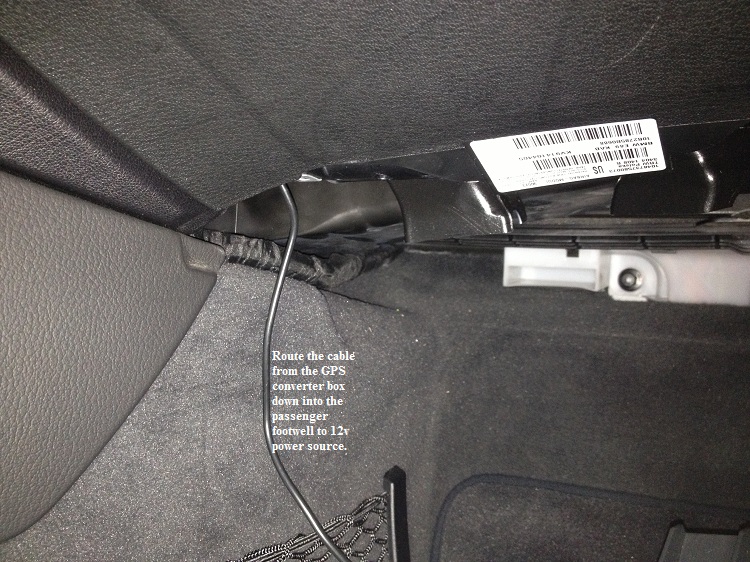
Now fish your wire from the radio opening, down and out close to where the 12v cigar lighter is located below the glovebox in the passenger footwell.
Attach the power end with the red and black wire to the wire you fished down and pull it out as shown.
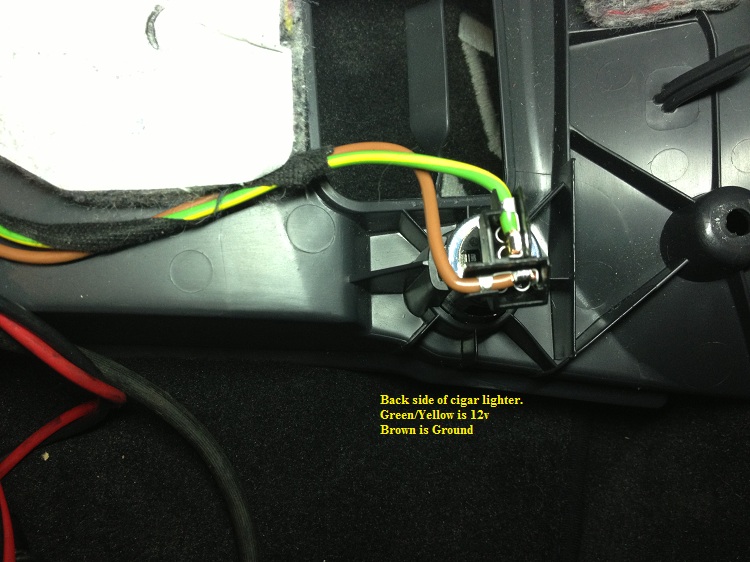
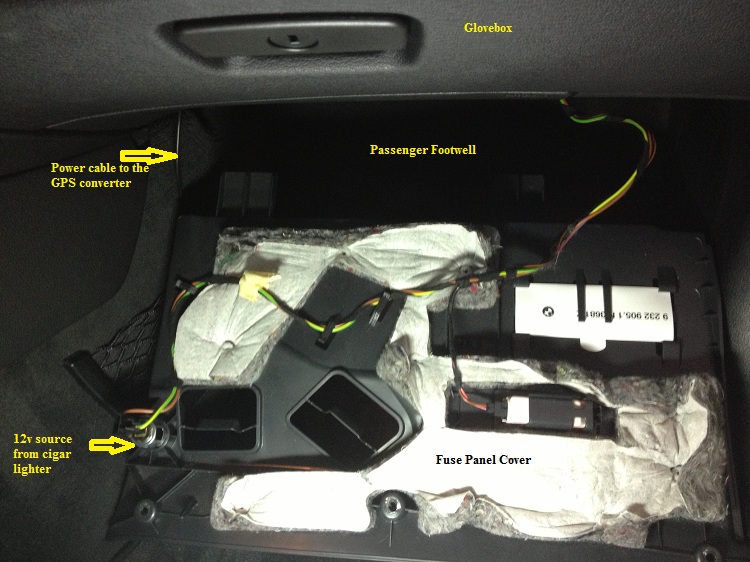
Yellow/Green wire is 12v and brown is a ground

Splice in the 12v and ground to the connector.

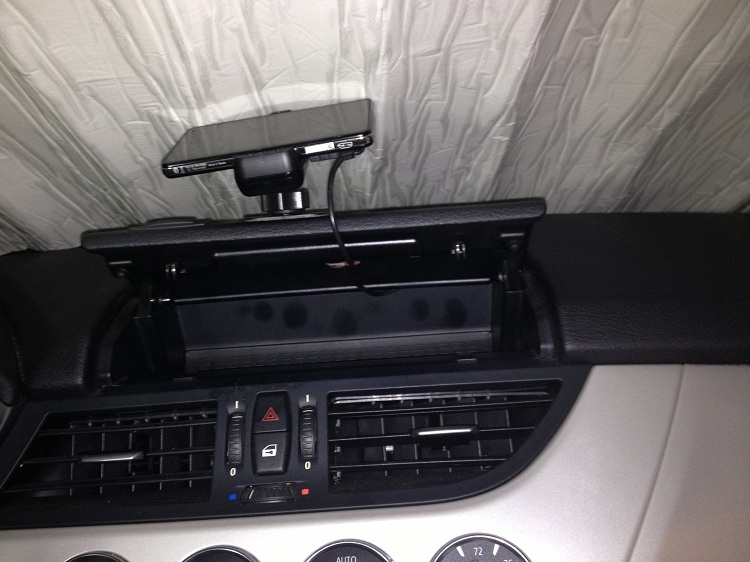
Route the pwr cord from the speaker area under the dash cubby door and into the dash cubby tray. Zip tie the cord back for a neat and clean install.
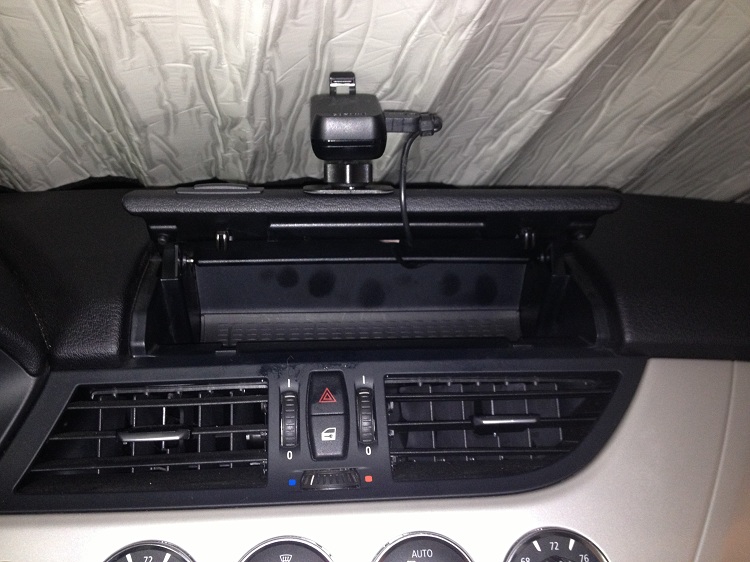 The adhessive mount did not work, the revision to this DIY starts at post #15. Scroll down
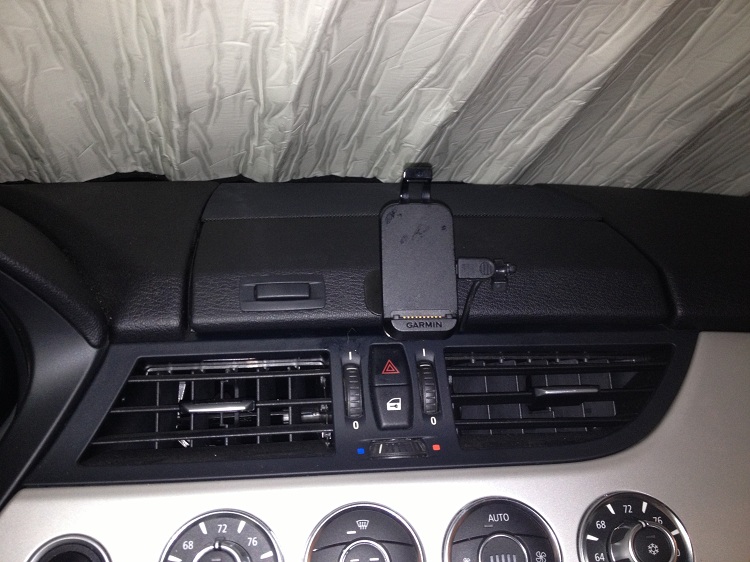
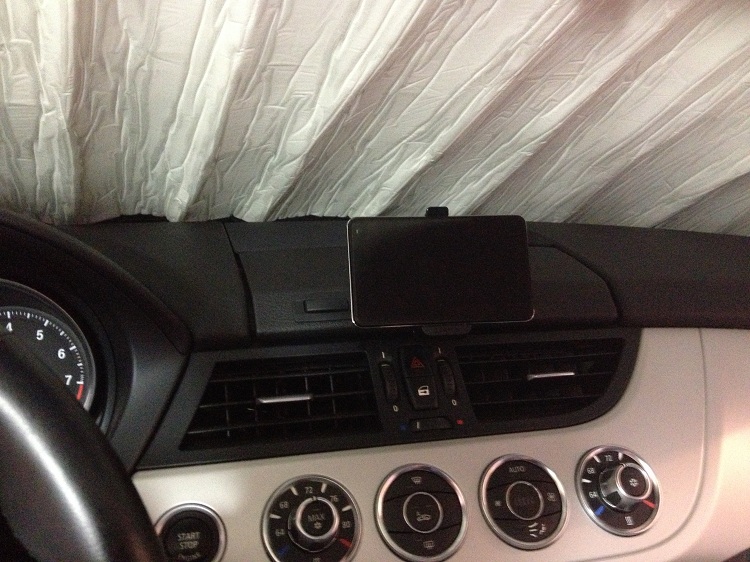
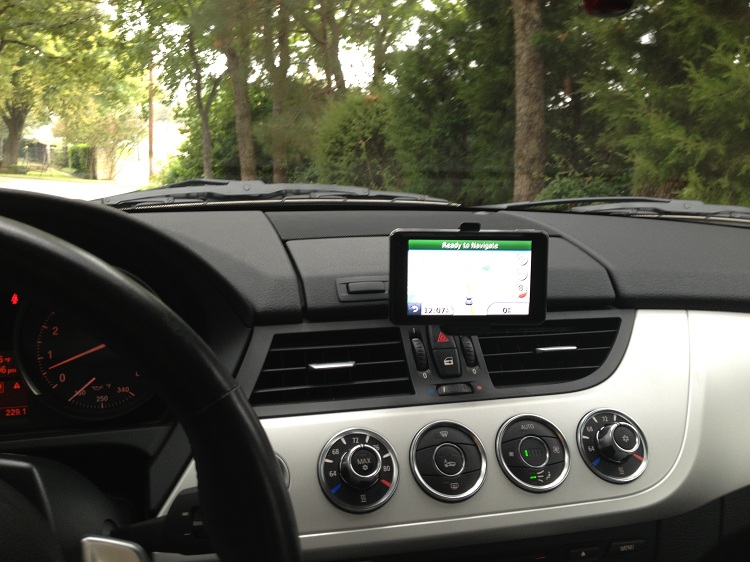
The finished results. No obstructed view, full use of the cubby compartment and convenient view of the GPS while driving.
The GPS will come on when you start your car and turn off when you shut the ignition off.
Garmin Nuvi Hardwire Cable (Mini-USB connector) for Garmin Nuvi $12.40 from Amazon
i.Trek IG-PSTARA Garmin Nuvi Sticky Mount $6.60 from Amazon
It will take you about 2 hours if you really take your time and do it slowly.
Scroll down to post #15 to see the revised mounting of the GPS. This one was not stable, so I had to re-do the mounting. The revised version ROCKS!